
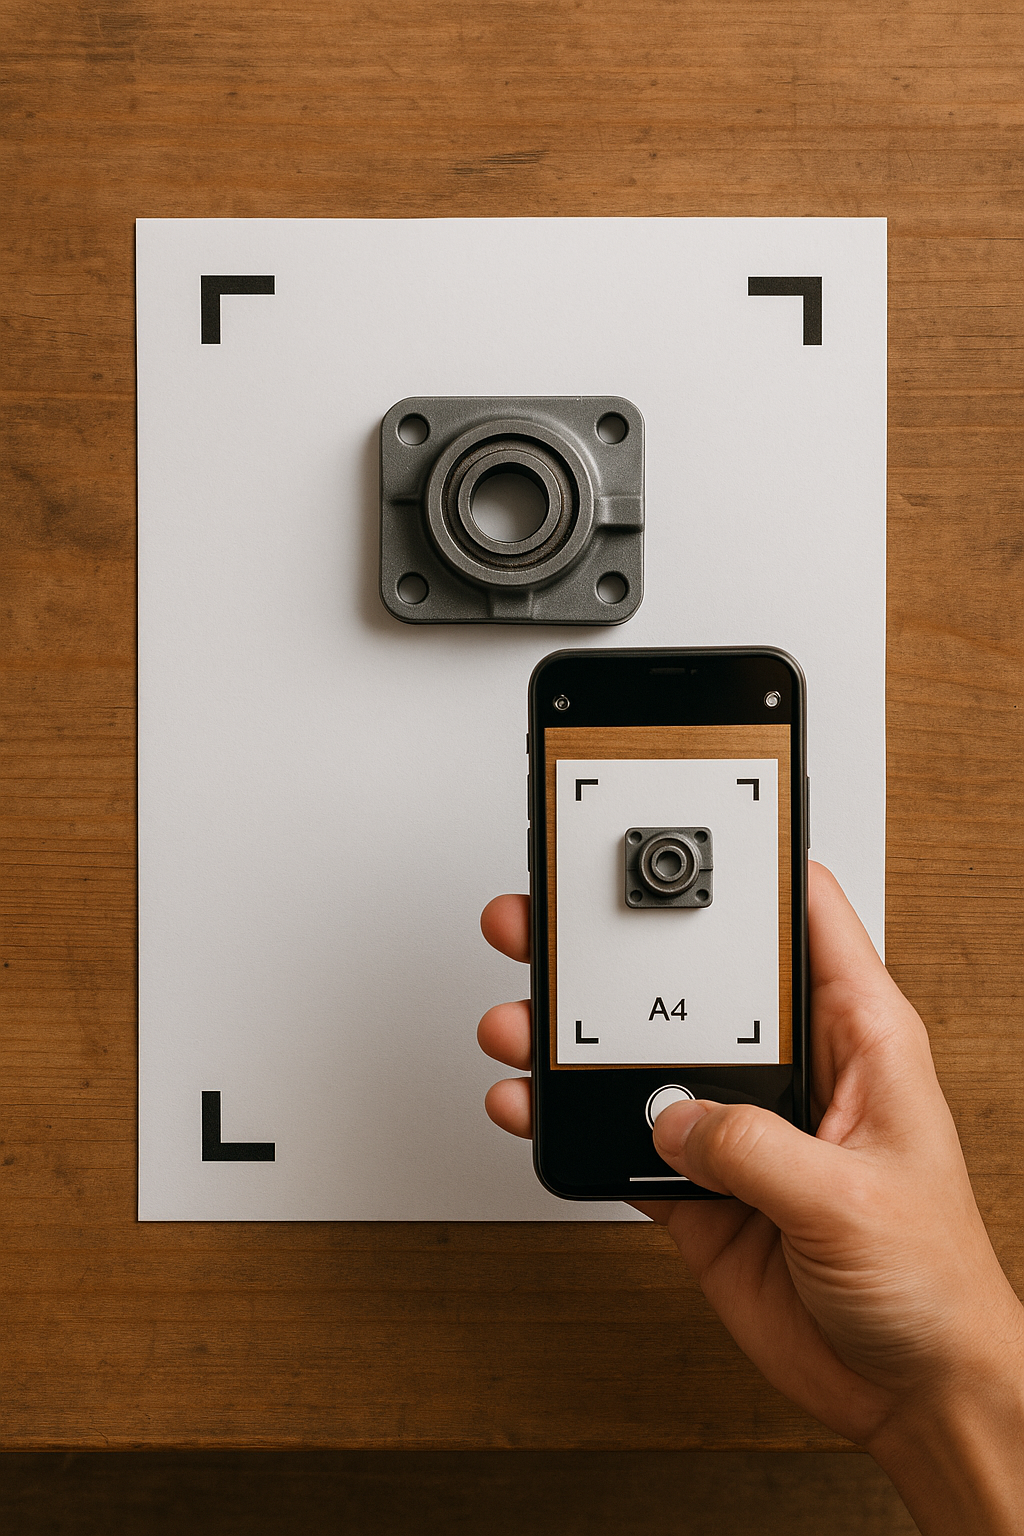
Whether you are converting sketches, mechanical parts or physical templates into SVG or DXF, the quality of your photo determines the quality of your final vector. Even the best tracing and segmentation algorithms depend on clear edges, consistent lighting and accurate scale.
This guide explains how to take photos that convert cleanly into vectors using ShapeScan, Inkscape, Illustrator or CNC and laser CAM software. The principles are simple, repeatable and work with nothing more than a modern smartphone.
Why Photo Quality Matters for Vector Conversion
Vectorisation works by detecting contrast changes between an object and its background. Any ambiguity in the photo forces the software to guess, which leads to:
- Jagged or wavy outlines instead of smooth curves
- Missing edges or broken paths
- Extra nodes that slow down CNC or laser jobs
- Incorrect scale when reference geometry is unclear
A well-prepared photo drastically reduces cleanup time and produces vectors that are closer to manufacturing-ready straight out of ShapeScan.
Basic Equipment You Need
You do not need a DSLR or studio lighting. For most vector projects, the following is enough:
- A smartphone with a clean camera lens
- A flat, matte surface such as a desk or MDF board
- A printed A4 ShapeScan template at 100% scale
- Soft, diffuse lighting (daylight or a lamp with a diffuser)
Step 1: Prepare the Object and Background
- Use a clean, flat background. The ShapeScan A4 template provides contrast and scale reference.
- Place the object fully on the paper. Any part outside the page may be clipped or scaled incorrectly.
- Clean reflective surfaces. Fingerprints and dust cause glare that hides real edges.
- Stabilise thin or flexible parts. Tape corners lightly if needed so the object lies flat.
Step 2: Lighting Setup
Lighting has more impact on vector quality than camera resolution.
- Use soft, even light. Avoid direct spotlights that create hard shadows.
- Eliminate strong shadows. Shadows can be interpreted as extra geometry.
- Check uniform brightness. The entire sheet should have similar exposure.
- Avoid reflections. Adjust the light angle rather than increasing brightness.
Step 3: Camera Position and Framing
- Hold the camera directly above the object. Keep the phone as vertical as possible.
- Include the entire A4 page. All borders must be visible for correct scale.
- Leave a margin. Do not crop tightly to the paper edges.
- Maintain a reasonable distance. Around 40–60 cm reduces lens distortion.
Step 4: Focus and Resolution
- Tap to focus. Lock focus on the object before taking the photo.
- Avoid digital zoom. Move closer instead of pinching to zoom.
- Use maximum resolution. More pixels mean cleaner edges.
- Stabilise the phone. Support your hands or rest the phone on a stand.
Common Photo Problems and Fixes
Jagged or noisy outlines
Usually caused by blur or low contrast. Improve lighting, stabilise the phone and ensure the object stands out clearly from the background.
Missing edges
Often caused by reflections or shadows hiding the contour. Adjust lighting angle or use a temporary matte spray or tape on shiny surfaces.
Incorrect scale
Almost always due to an incorrectly printed template or cropped page. Reprint at 100% scale and include all page edges in the frame.
Conclusion
Perfect vector conversion starts before you upload the image. With a consistent photo setup, ShapeScan can deliver clean, accurate outlines that require minimal editing and are ready for laser cutting, CNC machining or CAD workflows.
Once you find a setup that works well, keep it consistent. A repeatable photo process leads to predictable results and faster production.